Conduit Bender - Electrical Conduit Bending Is Easier With A Bending Chart

Electricians often need conduit benders and other bending tools to form electrical conduit and pipe to make it fit where it is needed. When used properly, they make accurate and consistent bends without damaging the conduit.
There are a wide variety of benders available. From hand operated tools to larger benders for forming electrical metallic tubing, intermediate electrical conduit, rigid piping and PVC conduit, the type you need largely depends on the size and type of conduit you are working with and how much bending needs to be done.
EMT, IMC and rigid piping needs a bender with a bending shoe. There is a groove in the bending shoe that matches the outside diameter of the conduit and supports the inner radius and outer wall as the bend is formed. For PVC conduit, you need a bender with a heating component to soften the plastic so it can be shaped the way you want.
Hand Benders
Hand operated benders are the simplest in design and have changed very little over the years. It is basically a shoe and a handle that rolls the conduit between the floor and the tool, gradually increasing the bend as it rolls. Shoes for hand benders are available in sizes from ½ inch to 1 ½ inches in diameter.
Hand operated conduit benders include Gardner-style and Benfield-style models. Both models work the same, but Benfield models are made of iron and are marked with bend angle reference points. Gardner models are made of die cast aluminum and have built in spirit levels to indicate 45 and 90 degree angles. For extremely tight radii, you would use a Hickey bender.
Mechanical Conduit Benders

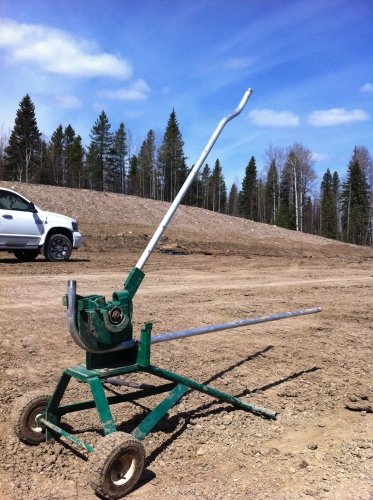
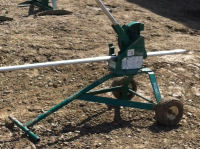
This type of bender is a step up from hand benders. It still takes manual force to make the bend, but they do have several features that make them more convenient. Most benders will include a ratcheting mechanism to increase the force you can apply to thicker conduit sizes and allow you to bend to the correct angle more easily. The unit is mounted to a small carriage that you can easily roll to wherever you need it and has a platform for working at a comfortable height. Some models have a removable frame, so you can mount it to your workbench or truck bed. There are several interchangeable shoes to accommodate various types and sizes of conduit. Most mechanical benders can handle ½ inch to 2-inch IMC, EMT, rigid piping and PVC coated conduit.
Electric Benders
For high production conduit bending, you need an electric model. These types can handle the same types and sizes of conduit as the hand operated and mechanical models but work much faster. They can make a precise bend in seconds with no effort from the worker.
Some electric models can bend several sizes of IMC, rigid piping and rigid aluminum without changing or adding shoes. Other types of pipe require different shoes. You can program an electric bender to make the same bends over and over and it is able to calculate layout measurements for different bends before work starts.
Hydraulic Benders
When you need to bend rigid electrical conduit from 2 ½ to 5 inches in diameter, you need a hydraulic bender. Electric benders can't make a smooth bend on pipes this large without squeezing, splitting or bulging the conduit. This type of bender is powered by a manual or electric hydraulic pump. Compact models for pipes 1 to 2 inches in diameter are also available. Hydraulic conduit benders can be adapted for conduit coated with PVC.
PVC Conduit Benders
PVC must be softened before it can be bent. Once softened, you use a guide device and hand gauge to form elbows, bends and offsets. Heating tools most commonly used to heat the PVC include tubes, boxes and blankets. You can place the conduit inside a heating box until it is soft enough. Blanket heaters are often used on conduit that is already installed and for custom bends. PVC conduit of nearly any size can be formed with the same equipment.
How to Bend Conduit
Aside from the conduit bender, there are few other electrician tools you will need for professional results.

You will need:
- Tape measure
- A shoe designed for the type and size of conduit
- Pencil or sharpie
- Small level
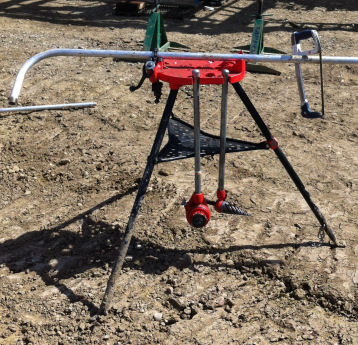
- Tri-stand
- Conduit
- Conduit threader, if using threaded conduit
- Conduit reamer (Remember to always ream out your pipe!)
Bending 90-Degree Bends
First, you need to determine how long the bend needs to be. For example, say you are running a ¾ inch pipe down the wall and need to run it into a box 12 inches away from the wall. From the start arrow to the back of the bending shoe there is a 6 inch take up, so you need to measure six inches from the end of the pipe and mark the point with your pencil. This six inches plus the six inch take up will give you the 12 inches you need.
On the front, right side of the bender shoe, you will see an arrow. Line this arrow up with the line you made on the pipe. Before you begin bending, check to see if the floor is level. A level floor makes the process easier. Also make sure that the part of the pipe that you measured is on the side of the arrow opposite the shoe. If you have the pipe in the bender the wrong way, you will end up with a bend that is twice the take up distance too short. (Tip: When you mark your conduit, put a small arrow on your line to show which way the bender should be when you bend.)

Take hold of the handle and pull it back towards you. When using conduit benders, always make sure to keep firm pressure on the back of the shoe. If you don't, it can slip on the pipe and your measurement will be way off, or the pipe could be kinked and ruined. While you are pulling, apply pressure on the heel of the bender shoe with your foot. On the side of the shoe you will see 30, 60 and 90-degree markings. Once your bender reaches the 90-degree mark, your bend is complete.
Some conduit will “spring” back slightly after it is bent. Check your bend against a wall or a corner to make sure it really is 90-Degrees. You can put the conduit back in the bender and overbend it slightly to compensate for the spring back.
Offsets
From small box offsets to seriously intricate bends, offsets can be a daunting task, even for seasoned electricians. Luckily, there’s an app for that!
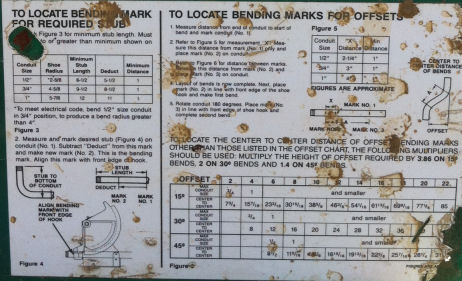
There is a wide variety of web pages and apps to help you calculate bends for offsets. If you know your conduit size, offset distance, and bend angles, a calculation program will tell you where you need to make your marks and to what angle to bend them. For complicated pipes it is a good practice to sketch out every bend beforehand and follow them in order. If you are lucky enough to have an electric bender, it can handle most of this work for you.
For small offsets, for entering or leaving a device box or fixture, you can typically eyeball the bend. Start with small bends and re-bend them as needed until you get the right shape. Experienced electricians can bend small offsets with one try, just from memory.
If you don’t have access to an app, and math is not your strong suit, there is a shortcut for offsets that is simple and effective. When using 30-degree bends, the offset distance will always be half the distance between bends. So, if the distance from the wall to your device is 6 inches, you would have a bend to bend distance of 12 inches.
Further Reading
Bending conduit can be more art than science, but with a little practise and a lot of patience, you can become the best bender on your crew. You might even get a few trophies! (Or, garbage pieces of pipe with a dozen meticulous bends)
Tools Required to Bend, Cut, Thread and Ream out Conduit
Foot Bender
Used to bend 1/2" Conduit/EMT to desired angles, make sure to get the appropriate size for your conduit bending
Pipe Cutter
Makes nice straight cut so threads aren't angled, works much better than a hacksaw for cutting pipe
Pipe Threader Set
Threads different general sizes of conduit 1/2-inch to 1-1/4-inch
Pipe Reamer
Smooths sharp edges on the inside of the conduit so wire insulation does not get damaged


